GPU stands for the graphics processing unit. In simple words, we also call it a graphics card. A GPU has many advantages when playing games, such as higher performance, higher frame rate, better texture quality, less lag, etc. Not only these, but GPU also enhances the shaders of a video game.
It happens with most gamers that they install a high-end GPU, but it is useless because your PC is not using your GPU for video games. As a result, the CPU has to carry most of the burden during the gameplay. In this article, I will try to clarify your concepts about GPU and fix the latter issues.
Why is My PC Not Using My GPU for My Video Game?
The main reasons behind it are no or less GPU usage, GPU driver issues, unoptimized games, CPU/GPU bottlenecks, CPU with integrated graphics, wrong game settings, etc. Installing official drivers, optimizing games, reducing bottlenecks, and using the proper game settings can solve these issues.
The first and foremost problem behind your PC not using your GPU for your Video game is that you might not have installed the latest and updated drivers from the official website. When you attach the graphics card to your computer system, your operating system detects and installs the graphics drivers.
But these drivers are for your graphics card’s minimum and primary use. In simple words, these drivers are not sufficient for your gaming needs. Hence, you need to go to the official website of your graphics card manufacturers and install the suggested drivers using their verified app, such as GeForce Experience.
Installing the official drivers from the manufacturer’s site is insufficient, and your PC may still not use your GPU for your video game. In this case, you must allow your graphics drivers app to optimize all the games you have installed on your PC. Most of the apps do this automatically after your permission.
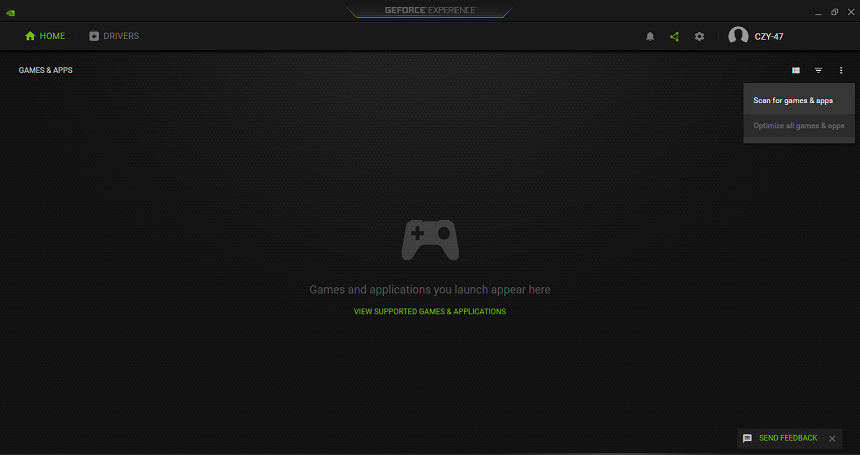
But if you have not permitted the graphics driver app to optimize your games, don’t worry; I will show you how to do this manually if you use GeForce Experience. You can open the app from the taskbar app section. After that, click on the three vertical dots in the top right corner of the UI.
Then, a small menu will open where you must select “Scan for games & apps” if you don’t see your installed games in the UI. Next, select “Optimize all games & apps” from the same interface and menu. The app will find out all your installed games and optimize them all.
There could be many other reasons your PC is not using your GPU. You have to check each aspect carefully.
- Bottleneck
- If you have been using a high-end GPU and it is not giving its best frame rate and performance, your GPU may have bottlenecks. The causes behind such an issue can be the low-end motherboard, CPU, or RAM. I recommend you find the best hardware that can run your GPU better.
- Executing Graphic Based Apps
- You could have a central processing unit (CPU) with built-in graphics optimized for running games and other visual programs. Consequently, your PC’s graphics processing unit (GPU) will be underutilized for gaming. However, you should keep your graphics card high priority, so the integrated graphics must do less work
- Switch To GPU
- You should switch from the central processing unit to the graphics processing unit. While games are optimized to run on your graphics processing unit (GPU), some also allow you to run on your central processing unit (CPU). If you change this setting from CPU to GPU, you should no longer experience any difficulties.
- Compatibility
- Compatibility could also be an issue in some cases. You could face such an issue if you have an old GPU installed on a new PC. So, it’s recommended that you always compare your motherboard, CPU, and GPU to get a perfect combination.
How Do I Force My PC to Use My GPU?
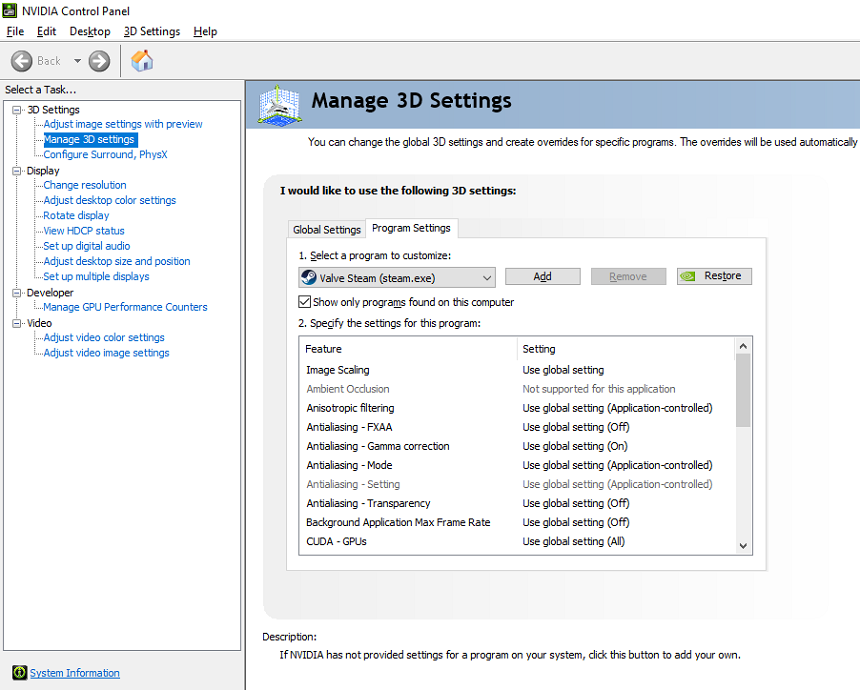
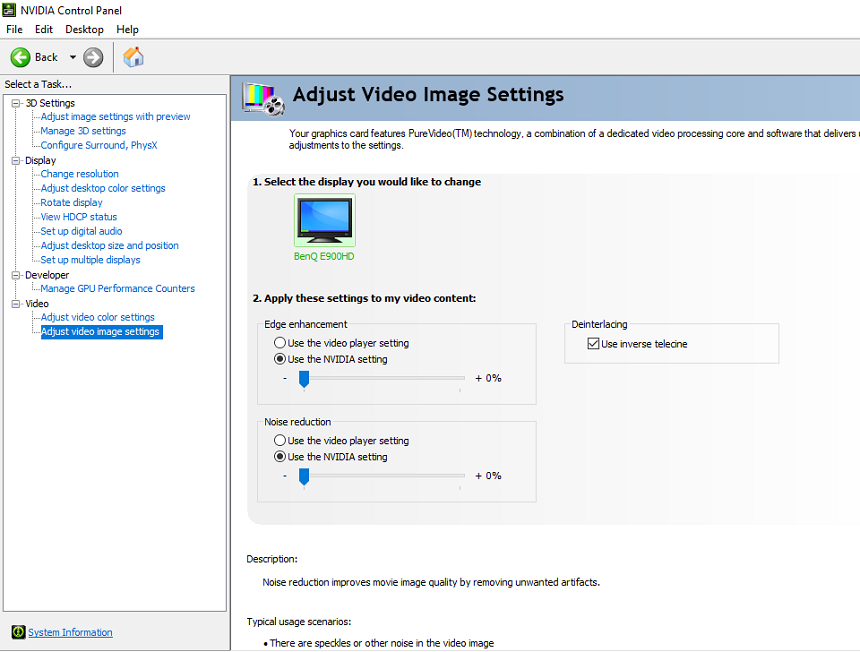
If you have been using Windows default drivers, then right-click on your desktop and select the app named “NVIDIA Control Panel.” A widow will pop up where you must press the “Agree and Continue” button if it is your first time opening the control panel. Next, In the “3D Settings” section, select “Manage 3D settings”.
On the UI on your right-hand side, select the tab named “Program Settings.” After this, the NVIDIA Control Panel will automatically list all the installed apps. You can choose a specific app to force your PC to use your GPU. Hence, you can only push your PC GPU to optimize a certain number of apps.
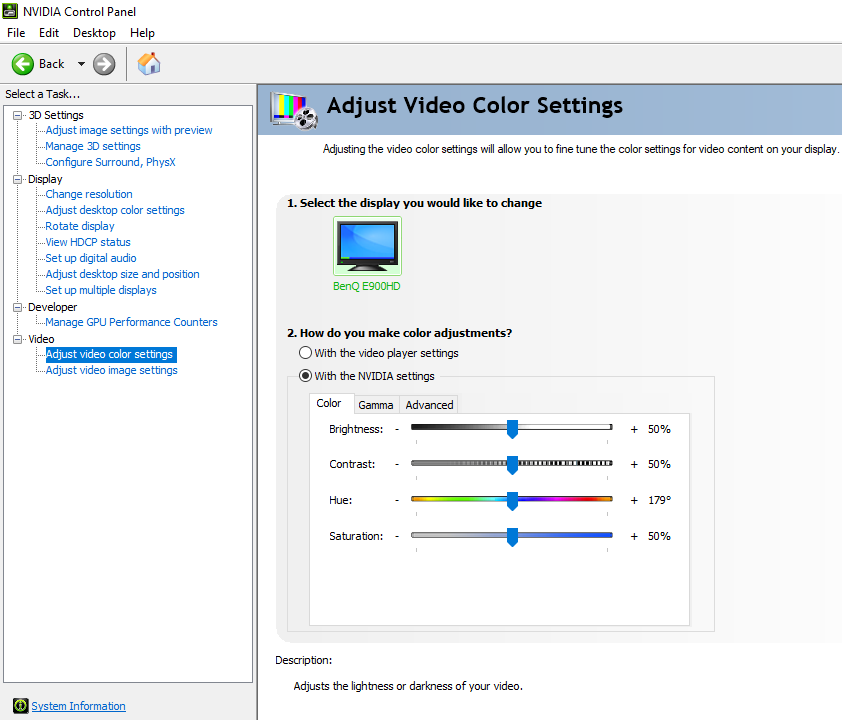
Further, in the “Video” section, select “Adjust video color settings.” Then, in the UI on your right-hand side, select the radio button in the “How do you make color adjustment” section named “With the NVIDIA Settings.” Then, apply the changes and do the same for the “Adjust video color settings” in the “Video” section.
But if you have been using a particular app like Geforce Experience, you can quickly force your PC to use your GPU. For this, open the app and then the menu with three dots. After this, scan for games and apps. In the end, optimize the games and apps.
How Do I Know What Graphics Card is Being Used?
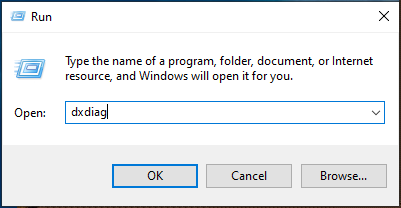
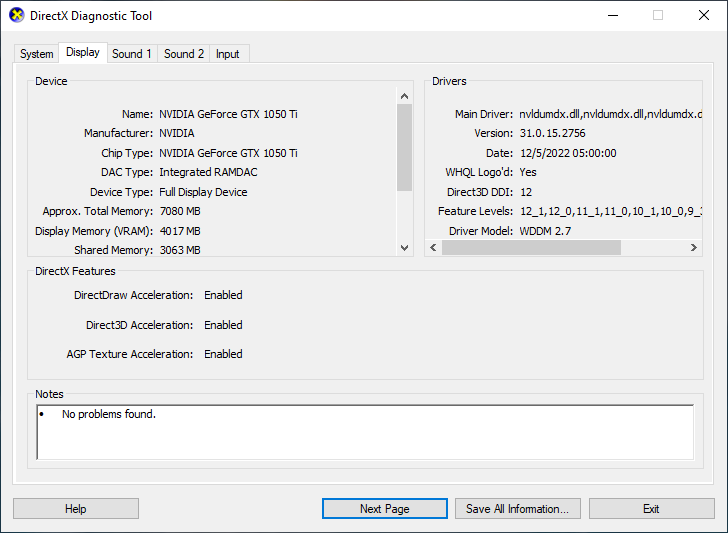
For this, there is a simple and easy method. First, press the Windows key on your keyboard or open the Start Menu using your mouse. Now, type the word “Run” and open the app that appears in the menu on the top. A small dialog box will appear where you must write “dxdiag” in the textbox and press “OK.”
A small Window with multiple tabs will appear. Go to the tab named “Display” in this window. Here, you will learn what graphics card is being used in detail. It will not only give you the info about your GPU, but you will also be able to install their drivers from their official websites.
How Do I Use GPU Instead of Integrated Graphics?
You may have integrated graphics in your system using a laptop, not a GPU. But if you use a gaming PC and dual monitors, the integrated graphics may be used for the second display to save power. In such a case, you have options to change the settings.
To switch from integrated graphics to GPU, go to your desktop and right-click to open the menu. Select “NVIDIA Control Panel” to open it. In the right list, select “Manage 3D settings” in the 3D settings. In the “global settings” tab, select the “preferred graphics processor” and switch to your GPU.
How Do I Force GPU in BIOS?
Forcing a GPU in BIOS means adjusting the settings in your motherboard. This method forces your GPU to always be used instead of the integrated graphics. You can also switch the external GPU if your PC uses integrated graphics. It resolves the issue for good.
Restart your computer to reach the “Startup Menu.” Read the text below suggesting the key to enter the BIOS. Press that key and select “Advanced.” Here, go to the “built-in device” option. Navigate to “Graphics” and select “Discrete Graphics.” Save changes before exiting the BIOS.
How to Check If GPU is Working?
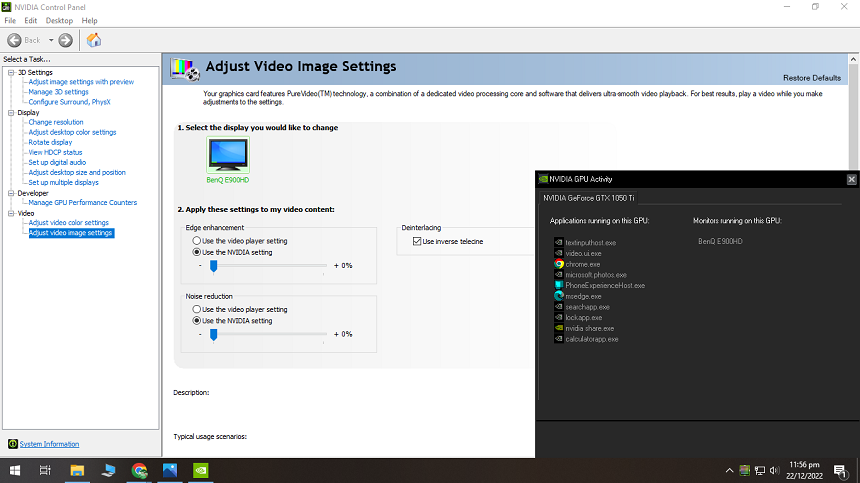
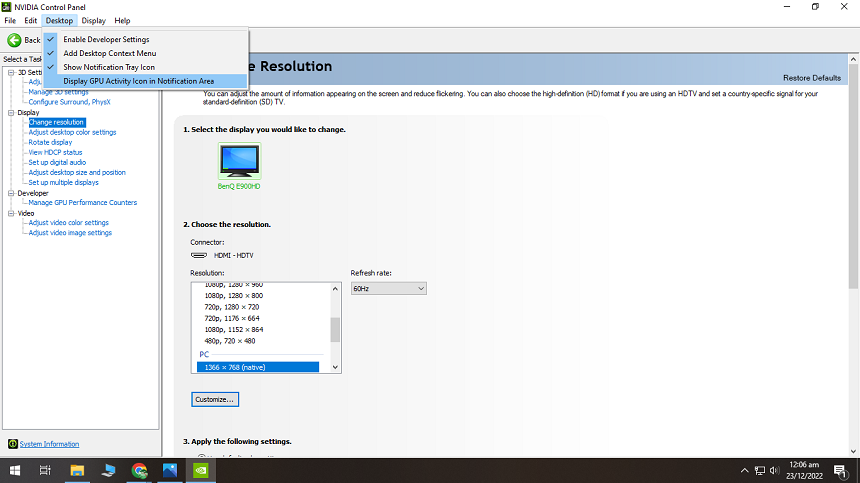
Click on the arrow icon on the right side of the taskbar to pop up all the hidden icons. Right-click the “NVIDIA Settings” icon and select “NVIDIA Control Panel.” A window will pop up with different settings. On the top, a menu will be named “Desktop” if you use a Windows operating system such as Windows 10/11.
In other operating systems, this menu might be named “View.” Open this menu and select “Display GPU activity icon in the notification area.” After that, an icon will appear on your taskbar’s right side. If you hover over this icon, it will tell you what graphics card is installed in your computer system.
And if you click it, a list will appear in a pop-up menu. This list contains all the programs or apps that you are currently using. It is how you can check if your GPU is working or not.
How Do I Maximize My GPU Efficiency? – Game Mode
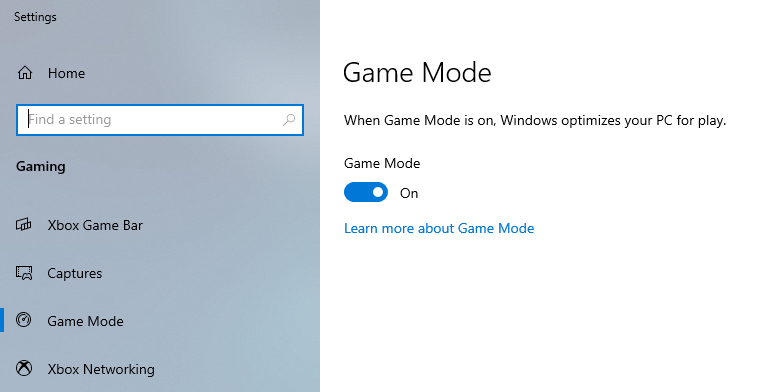
Maximizing the GPU efficiency primarily enables it to be used for high-end games. Several methods exist, and I have already mentioned the ones that allow you to play video games using your GPU. To maximize your GPU efficiency, you can follow these steps if you are a Windows 10/11 user. First, open the “Start Menu” by pressing the “Windows” key.
Next, type “game mode settings” and open the game mode settings with an icon of a meter. A window will pop up with an ON/OFF switch. Here, you can switch on the “Game Mode” to enjoy your favorite games on the Windows operating system. By the way, the latest Windows 10/11 automatically switches it on for you.
How Do I Enable GPU Acceleration in Windows 10?
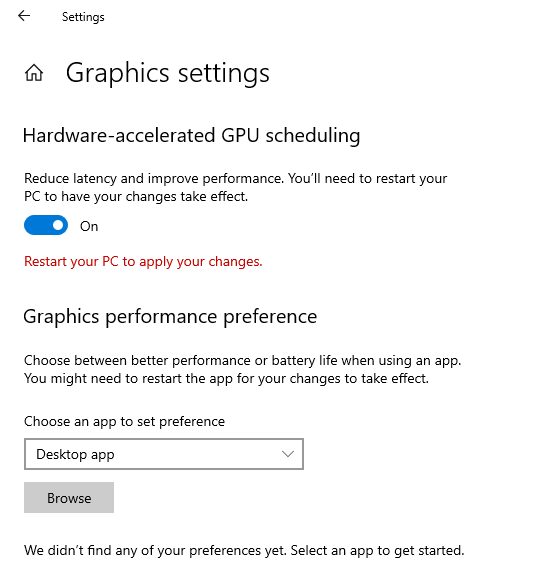
Accelerating your GPU may enable it to be used for video games. Enabling GPU acceleration in Windows 10 is a piece of cake. It will allow your PC to use your GPU for your video games. Press the combination of Windows + S keys using your keyboard for this. A menu will pop up containing the graphics-related apps and tools. Here, select the one named “Graphics Settings.”
A window will appear with an on/off switch titled “Hardware-accelerated GPU scheduling.” Switch this button on to enable the GPU acceleration in Windows 10. After that, I hope your PC can use your GPU for your video games.
Conclusion
You can use these methods to enable GPU acceleration and maximize its efficiency. You won’t have trouble setting up your GPU correctly if you understand these steps. So, follow the mentioned steps to resolve the issue. And if you don’t, I hope this article was helpful enough for you to understand further how it works.

Hey, I’m Hammad. I write for this website to help you with the IT advice about PC, RAM, CPU, Motherboard, PSU, and other PC components.
I will provide detailed guides with images, and explain step by step so you can understand the process. Check all my articles here.

